Steering Rack Bushing Install on 1990-96 300ZX
One of the most overlooked wear items on higher-mileage Zĺs is the steering rack bushings. Stock bushings are made of rubber, and after years of abuse they tend to break down and lose their elasticity, quite often breaking apart. This often results in vague steering response, failure of steering wheel returning to center after a turn, wheel shudder when braking, etc.
Parts Needed:
Installation:
1. Jack the front of the car up enough to work comfortably from underneath, using all proper safety precautions. Make sure to use at least two solid jack stands, as you will be fully under the car for the entire procedure. You will also need the jack stands to ensure that the wheels hang freely instead of using ramps.
2. Using the correction fluid mark the orientation between the steering rack spline and the u-joint so that you can align them in the same position during the reinstall. Also unplug the electrical wire that is secured on the inside of the driver's side frame rail.
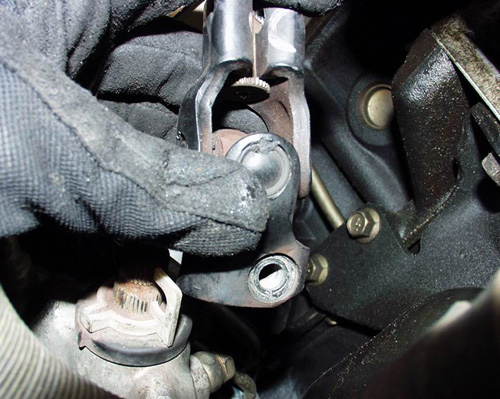
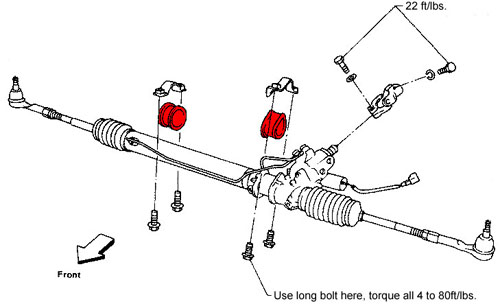
3. Unbolt the u-joint at the steering rack. (2 x 12mm) Slide the u-joint up and off the gear, being careful not to break the plastic index which aligns the steering shaft to the rack.
4. Remove rack bolts (4 x 17mm). Remove passenger side bushing. Move drivers side bracket to the side, out of the way. DO NOT REMOVE IT. On a TT, you will have a major hassle trying to get it maneuvered back into place. An NA has a little bit more latitude here.
5. Use a prybar to slide the now loose rack outward toward the driverĺs side of the car. (This was the reason for step 3). This allows you easy access to the area the bushings sit in. It may be helpful to have the igintion in the "On" postion so that the steering wheel isn't locked.
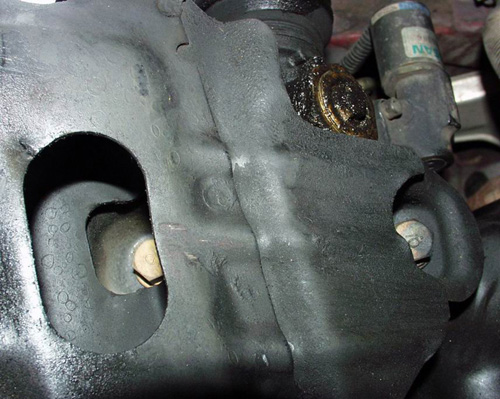
6. If the driver side bushing was not already cut, do so at this point. Wrap it around the rack with the pointed part over the pointed section on the rack housing. There will be a gap between the cut in the bushing which you will close by tightening down later. If you need more room to maneuver, slide the rack over a bit more.
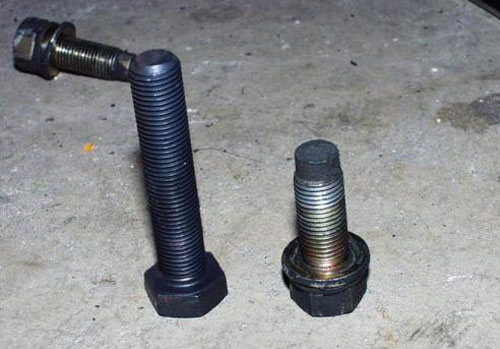
7. Slide the rack back into place. Start the thread of the stock bolt on the rear position on the driver side bracket. Using the longer bolt on the forward position, reattach the diver side bracket, but do not tighten down at this point. You will see here the benefit of the longer bolt.
8. Install the passenger side bushing. Again, if yours was not already cut, do so. It is a simple install at this point. Using stock bolts on this side is sufficient.
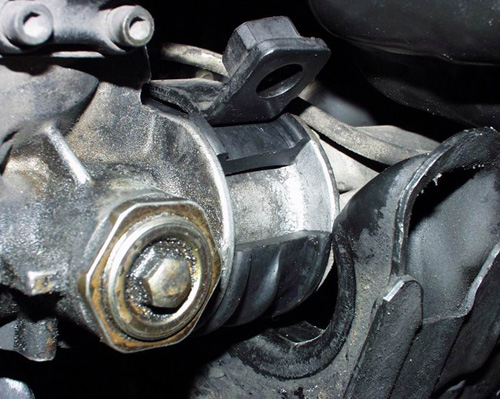
9. Slide the steering u-Joint back into place and align w. the mark you made earlier. Torque u-joint bolts (17-22 ft. lbs). Torque both driver side and passenger side bracket bolts (65-80 ft lbs). Plug in the electrical connection on the frame rail.
An alignment is recommended after any steering or suspesnion install procedure.